Published by Jeremy. Last Updated on July 27, 2022.
Disclaimer: This Week in Blogging uses demographic data, email opt-ins, and affiliate links to operate this site. Please review our Terms and Conditions and Privacy Policy.
When it comes to starting a new blog, what you do at the onset lays the foundation for your future success. To call these steps critical is a bit of an understatement as there are many ways where you can go down the wrong path before publishing a single post.
In an earlier article on our site, we talked about everything you need to consider when starting a niche blog. For the most part, that article focused on how to research a topic that you can truly own. What it did not do was dive into the technical aspects of launching a blog you need to consider at the same time.
In this article, we're going to highlight everything you may want to do to get your new site off the ground. While we tried to highlight only the most important tips, these should help put you on the best path to success. Some of these bullet points may be brief but likely require a fair bit of work. When available, detailed guides (both on our site and 3rd parties) will be linked to provide more information.
Tasks to Do Before Building a Website

Before committing a single penny into launching your website, there is a good deal of research you need to do to get started.
- Research your niche. Determine if anyone else is already focusing on your intended topic (or rather, angle) plus work on defining your audience and traffic potential. We dove down into starting a niche blog in this guide. Suffice it to say, we start here because this step is one of the most important things you can do to put yourself on the path to success.
- Check the availability of your desired name. Check availability of the domain on services like GoDaddy. Search for your ideal name on Google on its own, surrounded by quotes for an exact match query, as well as any close naming variations. Check the US Trademark Database as well as respective databases in your own country if you are outside the USA.
- Confirm availabilities of social media handles. At a minimum check Facebook, Twitter, Instagram, and Pinterest. This also helps re-confirm that no one else is pursuing your intended name/topic. You may also want to register on all social networks beyond these even if you do not intend to publish on there just to own your handle.
- Re-evaluate your topic one more time. Ask yourself if you are prepared to write about your intended topic for months or years on end. Will you still be interested if you do not make any money or receive traffic over that time? Will you still have article ideas five months from now? Five years? Do you have any time-sensitive elements in your idea that could affect your goals? If any of this is incorporated into your domain (or even overall niche), the best time to address it is before you buy.
- Buy your domain name. When all the above boxes are checked, buy your domain name.
- Register your social handles. Once you are committed to a brand name via your domain, lock down your social media handles as quickly as possible. You could also do this before buying your domain name as these are often easily changed.
Technical Building of Your Site
Once you have locked in your niche, domain, and social media handles, it is time to start building your website.
- First, you'll need to decide what Content Management System to use. We think WordPress.org is the gold standard here and do not entertain the idea of using anything else. Others include WordPress.com, Wix, Blogger, Squarespace, and more.
- If using WordPress.org, you'll need to purchase server space. Bluehost and Siteground are affordable options. BigScoots costs a bit more but includes Managed WordPress services at a respectable price point. You can read more about WordPress hosts here.
- Once you purchase hosting, install WordPress. Most hosts now have either one-click installs or will do the installation on your behalf if you request it.
- Set up your email accounts. The steps you take here could vary from host to host. Some include emails with your package (@domain.com) while others do not (wherein users go for a Gmail account like [email protected]). You may also want to set up email forwarding to your existing email account from your host's service. A good walkthrough to forward 3rd party email through Gmail is located here. Note that using email forwarding could result in delays in receiving emails (often 30-60 minutes).
- Purchase a theme and install it. Free themes exist, but paid themes give more design flexibility. We use GeneratePress for its customization potential and emphasis on site speed. A free version exists with a paid upgrade to unlock more features.
- Add relevant plug-ins useful for your site. Check out our list of WordPress plugins we use that have an emphasis on performance. Keep in mind that form (aesthetic) and function (technical capability) are often hard to balance.
- Customize aesthetically. Once you have the structure of your site in place, start working on the design to give an aesthetic pop, provide good user experience, and highlight your niche. Remember that a reader needs to understand what you're about in just a few seconds.
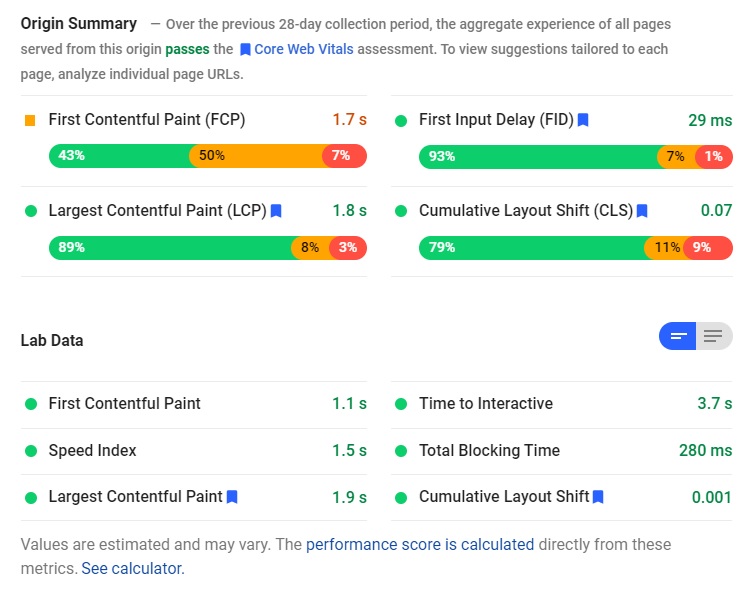
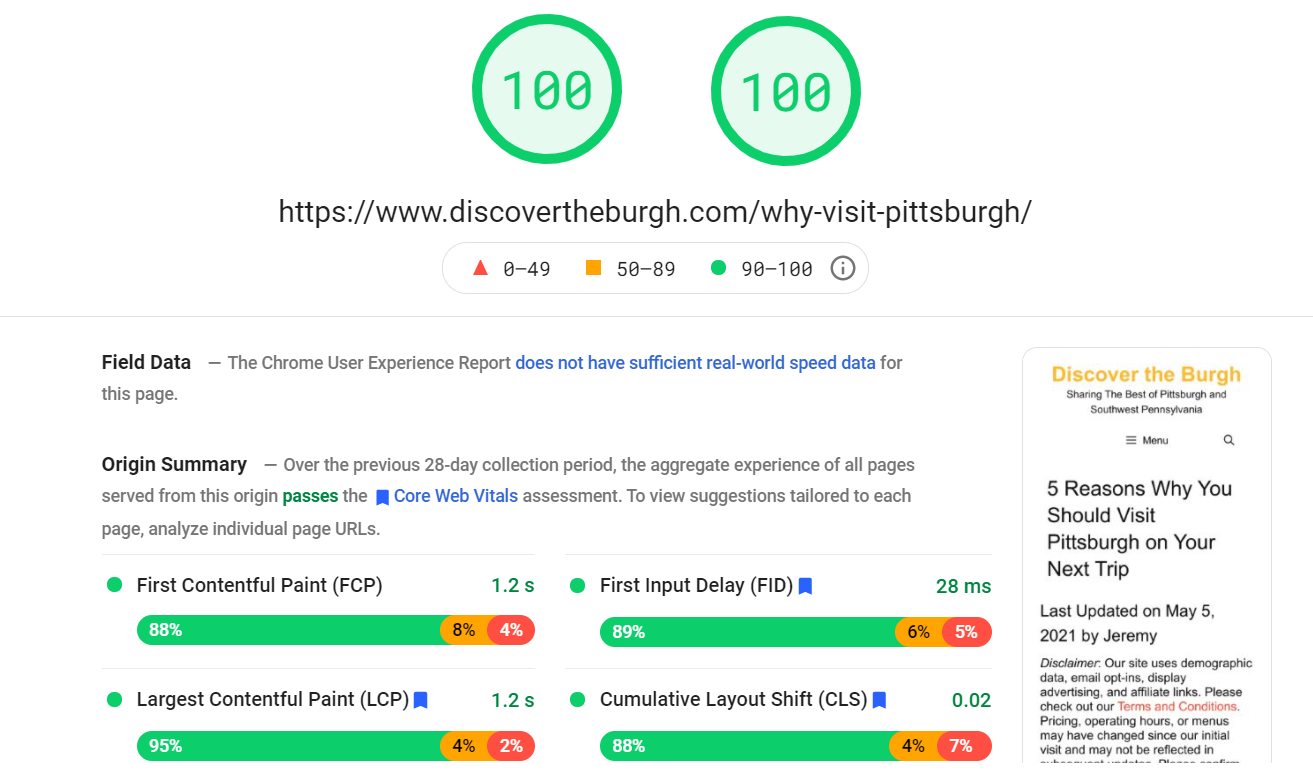
- Customize technically. Once you've put together a rough design, you will need to redo the work to look things over on a technical basis for site speed for, again, a good user experience (running a website is often a never-ending loop between these two). We have a guide on how to evaluate your site for speed here. Once again, balancing form and function is hard and may require several iterations of these two points. When in doubt, we always put emphasis on speed over aesthetics.
- Don't forget mobile. Check the previous two bullet points for performance on mobile as this is becoming the primary way users browse the internet these days. You may have to make CSS modifications for mobile based on specific browser widths. An intro guide is available here.
- Build standard back-end pages. These include the Homepage, About Us, Contact, Advertising, Terms and Conditions, Data Policies, Sitemap, 404 Page, and more. Note that your theme may have a 404 page setting built-in or you may require a plugin to select this. Required items for Privacy and Data Policies may vary by country.
- Subscribe to an RSS feed service. If you want to incorporate a blog roll into 3rd party services like a newsletter, you may need to subscribe to an RSS feed service. We use Feed Press.
- Install Google Analytics. Google Analytics is the gold standard analytics dashboard. In conversation, it is instantly assumed that traffic figures come from GA, and anything else is often considered to be inaccurate. We install ours using the Google Analytics by MonsterInsights plugin as it is very easy to use. Do not install twice as your traffic data will not be correct. We have free custom Google Analytics dashboards available here.
- Verify on Google Webmaster Tools. Submit your website on Google Webmaster Tools to start being indexed in search. You'll require your sites XML sitemap which is easily generated via the Yoast or Rank Math SEO plugins. Once verified on Webmaster Tools, be sure to go back into Google Analytics and set up your search console data under Acquisition -> Search Console -> Landing Pages as these two need to be connected to start getting search data displayed in Google Analytics.
- Submit to other Search Engines. Bing, Yahoo!, DuckDuckGo, Yandex (Russia), and Baidu (China) all have different submission requirements. You may not need to submit to all of these, but they are out there.
- Sign up for a newsletter service. We like Mailerlite. Add sign up prompts onto your website to capture subscribers. You do not necessarily have to send out newsletters starting on day one, but getting the email capture set up is a good practice early on. (If you subscribe to an RSS feed, you could also create a quick newsletter that simply sends out your newest articles weekly or monthly and forget about it for a while.)
Starting a Marketing Plan

So far we've only focused on the overall scope and technical build for your blog, now we're starting to think about content. But before you publish a single article, you need to put together a marketing plan.
- Brainstorm ideas for your first 10 articles. Articles should be a mix of static pages to tell your story, conventional articles, and more. While most users will not look at 10 articles when visiting your site, having a mix here should help paint the picture of what you're going to be about if someone does decide to click around.
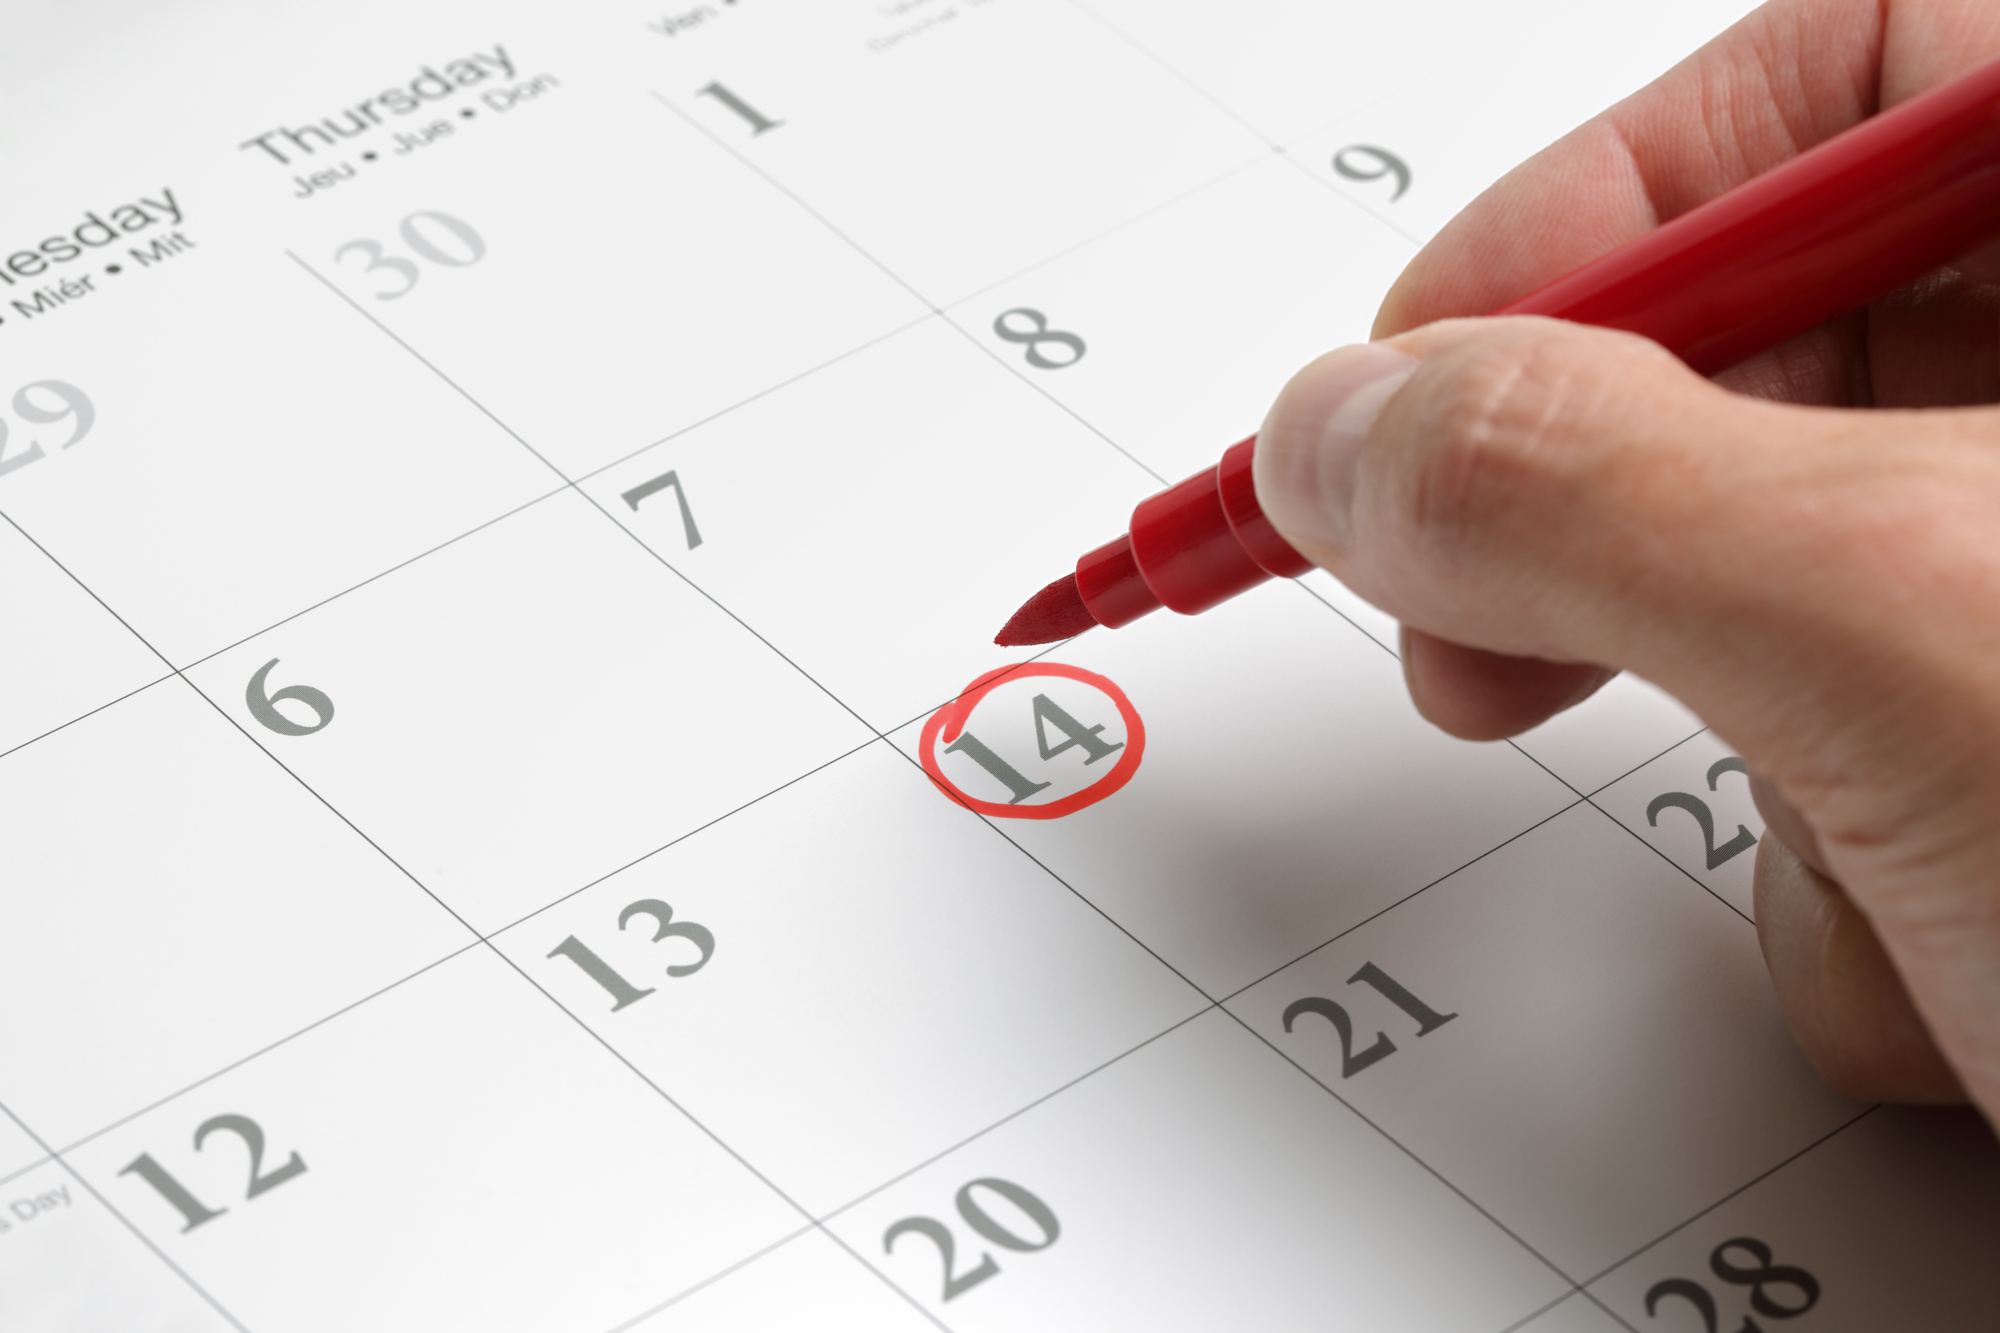
- Settle on a launch date. Do you need one article to “go live”? Five? Ten? Fifty? It really is hard to say. We think the right number is however many you need to paint the picture of your site should someone start clicking around (hence the 10 recommended above). Sooner is always better than later as we often overthink the traffic potential of a site early on. Your first readers may see a non-complete website, and that is totally okay!
- Determine how often you'll be able to publish new articles. This is often niche dependent. We believe consistency is key above anything else. That being said, those who can publish 1-3 articles per week, especially early on, will likely do better than those who only publish 1-3 articles per month.
- Plan how you will share your content on social media (articles + images). For any given piece of content, you should have an idea of where, when, why, and how often you will share it. We like to create spreadsheets to log when those shares were as you can re-share evergreen content in the future for continual promotion. A few things to make life easier include:
- Services like IFTTT are great for creating automatic sharing scenarios between networks. (E.g. Posting Instagram images and captions to Twitter automatically.)
- Tailwind is also a great scheduling tool for Pinterest and/or Instagram to help save time. Check out our Tailwind review here.
- Put together an advertising plan. Test advertising on relevant social media to get fans starting on day one. Most networks have minimum spending of $1/day which makes testing affordable for most. Remember, your ideal audience won't just find you- you have to go to them (at the start at least). Advertising can include boosting existing posts, advertising for fans, and more. Test in 5-10 day spans, analyze the results, and try again while doubling down on what works. $100/month in testing goes a long way.
- Learn about SEO and decide how to integrate keywords in articles. While you may not rank for keywords on day one, putting together an SEO plan from the start will set you up for success in the long run. Performing keyword research, coming up with a keyword integration plan, and how you will interlink articles are all good starts.
- Determine if (and when) affiliate marketing makes sense. You may not want to incorporate affiliate links right away as some networks will take you off if you do not convert a sale in a specific period of time (often 6-12 months). But having a plan in place for products you may want to sell in the future helps give direction early on.
- Establish goals for the short term (monthly) and long term (yearly). Most blogs take years to get to tens of thousands or hundreds of thousands of page views per month. This is a long game. Establish realistic goals you want to achieve early on be it simply 10 articles published in month one, 500 Instagram followers in month three, etc. There is no shame in changing the goalposts over time.
Now You Can Finally Publish

Finally, the time to publish is here. These are the first things you need to do.
- Develop your voice. Your articles are your chance to share your expertise in the niche you have chosen. Craft your articles as a means to develop your voice as an authority within your field. You may not be one at the start, but your goal should be to become one over time.
- Be consistent. It often takes months or years for new blogs to start seeing growth. It is very easy to get frustrated and give up. There is a reason why we say the best niche is one you can write week-in, week-out for years even without any positive results, as this is often what happens.
- Test everything. In the internet age everything is measurable. If you have an idea for a new article style, speed improvement, or affiliate setup, be methodical. Plan out what you're going to do, test it, and log your results.
- Take stock monthly. Give yourself time to reflect on tests, changes, and any growth to see what works. If you find something that seems to do well, double down on it! If something isn't going the way you want, keep in mind that it could also just be a matter of timing. What doesn't work now may work in the future when your audience and traffic changes (or vice versa).
- Do not be afraid of change. A website may look like a static resource, but it is anything but that. Best practices evolve, old content becomes outdated and may require updates, and plugins, programs, and services change.
- Join blogging newsletters and Facebook groups. Stay up-to-date with blogging advice and best practices by joining newsletters like ours (sign up below) as well as Facebook groups (Digital Nomad Wannabee, Make Traffic Happen, and Business of Blogging are great general groups, plus other groups specific to your niche). These are wonderful spaces to stay up-to-date with best practices and take part in the community at large.
While the above tips are not necessarily everything you need to do when running your blog, it is a good starting list of things you need to consider- especially when launching a new site.
Best practices are always evolving, and as we share in our newsletter news hits the blogging world daily. As such, the last few tips we leave you with are key above all others:
- Develop your voice as an authority on your topic. If something doesn't feel like it is aligned with this goal, stop and ask yourself why you're doing it.
- Test everything and engage industry considered best practices. Data is free-flowing online and best practices help you avoid mistakes made by the thousands upon thousands of bloggers that came before you.
- Be consistent with regular publications. You're in it for the long haul.
When in doubt, revert to these points and go from there. For anything else, we're always here to help!
Join This Week in Blogging Today
Join This Week in Blogging to receive our newsletter with blogging news, expert tips and advice, product reviews, giveaways, and more. New editions each Tuesday!
Can't wait til Tuesday? Check out our Latest Edition here!
Increase your blog's revenue with Raptive!
Add premium display advertising on your blog with Raptive- accepting blogs starting at 25,000 pageviews per month! (Additional terms may apply.)
Upgrade Your Blog to Improve Performance


Check out more of our favorite blogging products and services we use to run our sites at the previous link!
How to Build a Better Blog
Looking for advice on how to improve your blog? We've got a number of articles around site optimization, SEO, and more that you may find valuable. Check out some of the following!